


Roboclaw Motor Controller setup
Prerequisites:
0. Raspberry Pi 4 4GB Model
1. Complete computer-rpi-setup
2. Complete roboclaw-config
Serial Interface Setup
The roboclaw motor controller is not powered via the micro-USB port. In order to power the motor controller the Roboclaw must be connected to the Main Battery. Alternatively, a Logic Battery (Backup Battery) may be connected to the RoboClaw.
- With the motor controller powered off, connect the controller via the micro-USB to the Linux machine you wish to interface the controller with.
- Open a terminal and issue the following command to capture the serial port device label e.g.
/dev/tty*More info
dmesg --follow
- Power on the controller buy connecting the Main Battery.
- On the Linux terminal you should see this something like the following:
[604400.525618] cdc_acm 1-1.3:1.0: ttyACM0: USB ACM device
                                   ^^^^^^^ make note of this label
If you're using a terminal within a docker container you may need to try running the container in "privileged" mode. This is consider unsafe in some circumstances so you may look here for details on how to expose serial interfaces more securely.
- Make note of the label and use it to revise any software serial port parameter used.
Precaution: This serial interface label is liable to change depending on various reasons. See udev rule in order to create a persistent label for serial port device.
- To use the serial device as non-root user, udev rules must be installed.
cd /etc/udev/rules.d/
sudo vim 51-roboclaw.rules
The idProduct and idVendor are found by todo
# Copy this udev with "sudo cp 51-roboclaw.rules /etc/udev/rules.d/"
# When done, do "sudo udevadm control --reload && sudo udevadm trigger"
# Edit it to suit your type of Linux. It's currently set up for modern Ubuntu
ATTRS{idProduct}=="2404", ATTRS{idVendor}=="03eb", MODE:="666", GROUP="plugdev"
sudo udevadm control --reload && sudo udevadm trigger
ROS2 Roboclaw Node Setup
This project is using the ros2 humble from https://github.com/ProjectLadon/roboclaw.git. Some parameters will need to be adjusted.
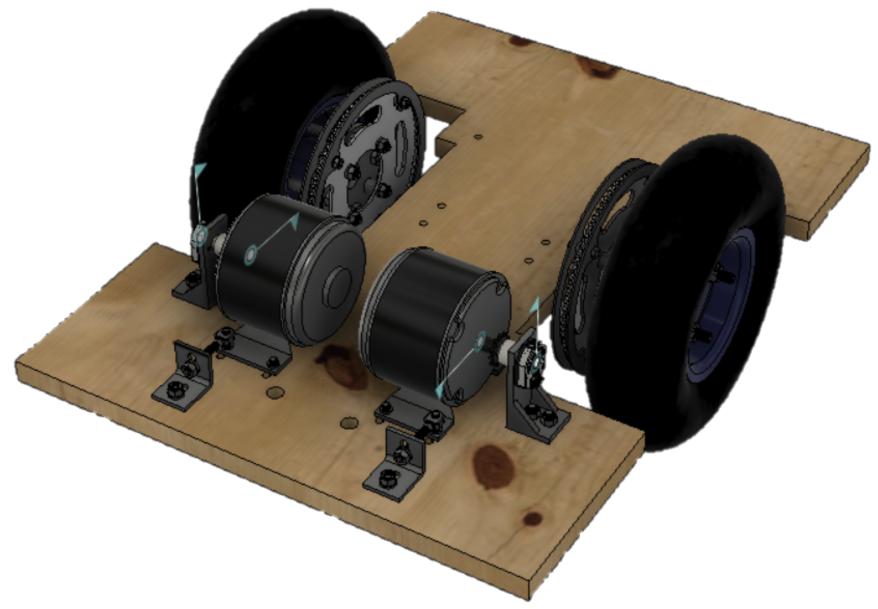
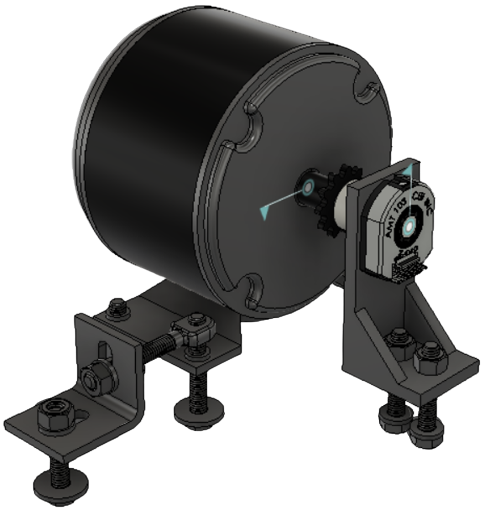
Mechanical and Encoder Specs
Wheel base width (m): 0.350
Wheel radius (m): 0.127
Wheel circumference(m): 0.798
Meters per wheel revolution (m/rev): 0.798
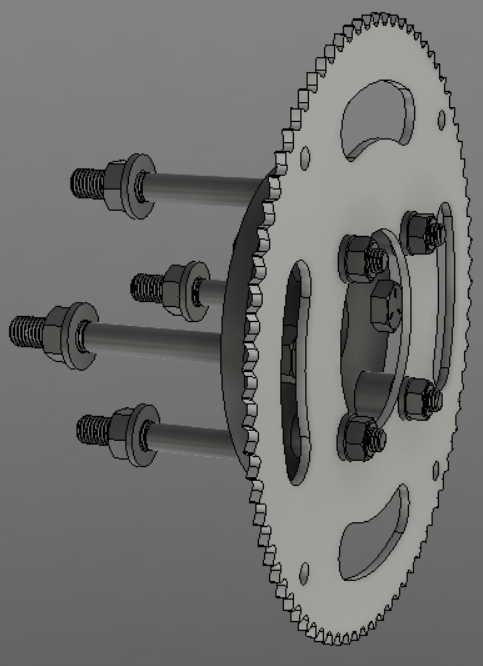
Gear ratio: 80/11
Pulse per revolution (ppr): 2048
4*ppr*gear_ratio = Steps per wheel revolution`

4 * 2048 * (80/11) = 59578.1818182
Steps per wheel rev: 595782.18
Steps per meter  =  (steps per wheel rev)/(meters per wheel rev)
Steps per meter  =   59578.18 / 0.798
Steps per meter = 74659.37
ROS2 roboclaw node setup and test
- verify roboclaw_single.launch
<node pkg="roboclaw" type="roboclaw_node" name="roboclaw" output="screen">
    <param name="~serial_port" value="/dev/ttyACM0"/>
    <param name="~baudrate" value="115200"/>
    <param name="~roboclaws" value="1"/>
</node>
- verify diffdrive.launch parameters
<node pkg="roboclaw" type="diffdrive_node" name="diffdrive" output="screen">
    <param name="~roboclaws" value="1"/>
    <param name="~steps_per_meter" value="74659.37"/>
    <param name="~base_width" value="0.350"/>
    <param name="~swap_motors" value="false"/>
    <param name="~invert_motor_1" value="false"/>
    <param name="~invert_motor_2" value="false"/>
    <param name="~var_pos_x" value="0.01"/>
    <param name="~var_pos_y" value="0.01"/>
    <param name="~var_theta_z" value="0.01"/>
</node>
- Before build the roboclaw ros2 package on the rpi4 you may need to install libboost dependencies
sudo apt install libboost-sys*
- Build roboclaw node. on VS Code, Ctrl + Shift + P, enter "Run Task", Enter "build"
- Source the environment
. install/setup.bash
- Search for teleop twist keyboard package
apt search ros-humble-teleop
- Install teleop twist keyboard package
sudo apt install ros-humble-teleop-twist-keyboard
- verify packages are installed
ros2 pkg executables
- Run the main node "roboclaw_node"
ros2 run roboclaw roboclaw_node --ros-args -p "serial_port:=/dev/ttyACM0"
- Run the "diffrive_node" with the parameters. This is remapping the published topic
motor_cmd_velto/roboclaww/claw0/motor_vel_cmdin order to interface with with "roboclaw_node"
ros2 run roboclaw diffdrive_node --ros-args -p base_width:=0.350 -p steps_per_meter:=74659.37 -p swap_motors:=false -r /motor_cmd_vel:=/roboclaw/claw0/motor_vel_cmd
- Run the teleop-twist-keyboard node
ros2 run teleop_twist_keyboard teleop_twist_keyboard
This configuration may not safely stop the motors during a network connection loss, and you may lose control the bot. A possible improvement would be to include a time out mechanism that breaks the motors when the "roboclaw_node" has not received a control command after a given amount of time. This may be done with an extra ros2 node.
ROS2 roboclaw node improvements
- Open a terminal
- Launch the
teleop-test.xmllaunch file. This combines steps 7 and 8 from the previous section.
ros2 launch ./launch/teleop-test.xml
- Press
Cltr + Shift + Sto split the terminal - Run the teleop node on the second windows
ros2 run teleop_twist_keyboard teleop_twist_keyboard